


Views: 0 Author: Site Editor Publish Time: 2026-06-30 Origin: Site


Material failures at the production stage drain resources. You cannot afford ruined screen printing screens, smeared positives, or jammed printers. These disruptions halt workflows and compromise final project quality. Finding the exact material match prevents these costly errors. This article provides a clear technical evaluation framework. We will help you match specific Inkjet PET Film properties to your exact hardware and daily production requirements. Not all transparent or semi-transparent sheets are engineered equally. Your ultimate success depends heavily on material chemistry. You must pair the right microporous coatings directly to your unique ink type and specific end-use case. We will walk you through the precise steps to test, validate, and select the optimal media for your setup.
Coating dictates performance: Your printer's ink type (dye vs. pigment) must align with the film's receptive coating to prevent pooling and ensure fast drying.
Opacity matters for density: While clear film works for basic overlays, matte waterproof milky inkjet film is the industry standard for screen printing due to its higher ink-load capacity and superior UV blocking.
Thickness impacts handling: Standardized thicknesses (typically 4mil to 5.3mil/135micron) determine dimensional stability and printer feed reliability.
Testing is mandatory: Always evaluate Dmax (maximum density) and exposure times on small sample batches before committing to bulk roll or sheet purchases.
Choosing the wrong material creates immediate bottlenecks in your production environment. You quickly discover that hardware capabilities mean nothing without compatible media. When materials fail, they often fail catastrophically during critical production runs. Recognizing these specific failure points helps you understand why technical specifications matter so much.
Using standard plastics without an inkjet-receptive coating leads to disastrous results. The ink simply has nowhere to go. It sits on the surface, pooling into wet droplets. These wet prints smear instantly upon touch. They never fully cure or dry. Migration occurs when colors bleed into one another, destroying sharp lines. This ruins any attempt at creating high-resolution graphics or precise text.
Screen printers rely heavily on opacity. You need the printed areas to block ultraviolet light entirely during the exposure process. Inferior materials cannot hold enough ink without bleeding. They create washed-out stencils. Light leaks through the thin black ink, hardening the emulsion where it should remain soft. Poor Dmax (maximum density) directly translates to jagged edges and lost details on your final screens.
Commercial hardware operates at high speeds. Thin or flimsy materials struggle to pass through these complex roller systems. Media prone to static electricity will cling together. This causes the printer to pull multiple sheets at once, resulting in severe hardware jams. Furthermore, transparent media lacking a sensor-friendly backing strip often triggers continuous feed faults. The optical sensors simply cannot detect the clear edge.
Heat and humidity constantly affect your operating environment. Inferior plastics react poorly to these changes. They warp under the heat generated by the printing carriage. They also shrink when exposed to humid ambient air. This dimensional instability ruins multi-color registration. If your positive shrinks even a fraction of a millimeter, your color layers will never align correctly on the press.
Understanding the visual finish of your media is crucial. Manufacturers offer different opacity levels to serve distinct technical purposes. You must match these visual characteristics to your desired end-use. Choosing between optically clear and frosted options fundamentally changes how the media interacts with light and ink.
Optically clear materials prioritize absolute transparency. You can see through them perfectly, like glass.
Best for: You should use this finish for color overlays, packaging mockups, and backlit graphics. It excels wherever absolute transparency is a strict requirement.
Limitations: Clear media generally holds less ink than textured alternatives. The smooth surface offers less area for receptive coatings to grip. Additionally, desktop printers often struggle to load this material. Optical sensors fail to register the transparent leading edge. You often have to apply a strip of masking tape to the edge just to force the printer to recognize the sheet.
This category trades absolute transparency for superior performance and handling. The translucent, frosted appearance comes from a specialized surface treatment.
Best for: This finish is ideal for screen printing positives, flexographic plates, and high-density line art.
The specific advantage: A matte waterproof milky inkjet film features a highly engineered micro-textured coating. This texture absorbs heavy ink loads rapidly. It traps the liquid payload securely to achieve maximum black density. The milky finish scatters light gently but remains highly transparent to UV light during screen exposure. It also resists environmental humidity far better than slick, clear alternatives.
Feature | Optically Clear Film | Milky / Matte Film |
|---|---|---|
Transparency | Glass-like, completely see-through | Translucent, frosted appearance |
Ink Capacity | Moderate | Very High (ideal for Dmax) |
Sensor Detection | Often fails; requires taped edges | Easily detected by optical sensors |
Primary Use Case | Mockups, overlays, backlit displays | Screen printing positives, plate making |
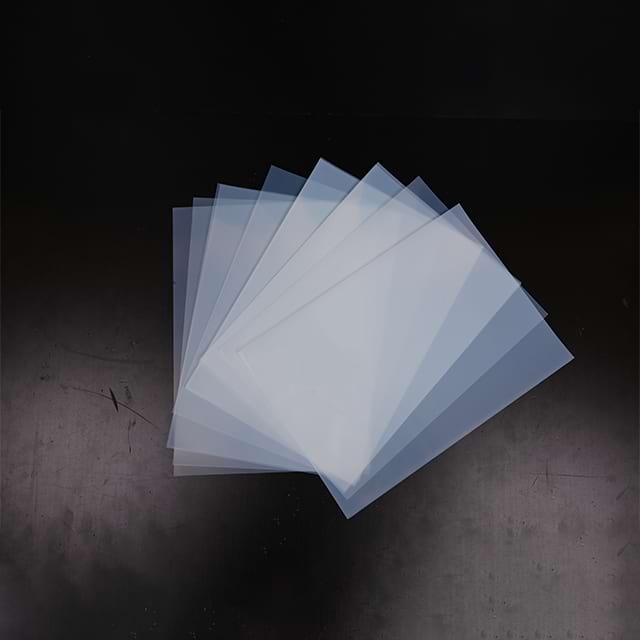
You cannot separate the physical media from the liquid chemistry. The relationship between the two dictates the quality of your output. Printers utilize different formulations, and coatings are explicitly designed to react to specific fluid dynamics. Failing to verify this compatibility leads to immediate smudging and ruined batches.
Dye formulations dissolve colorants fully into a liquid carrier. They are standard in many consumer and desktop photo setups.
This chemistry requires a specific swellable or microporous coating to function. The colorant penetrates the top layer deeply. This interaction yields incredibly sharp edges and vibrant hues. However, dye formulations are highly vulnerable to moisture. A stray drop of water will reactivate the colorant and cause immediate bleeding. You must print dye formulations on materials specifically rated to handle and lock in aqueous moisture.
Pigment formulations suspend microscopic color particles in a liquid carrier. They are the standard chemistry in large-format commercial setups.
Unlike dyes, pigment particles sit on top of the receptive layer. They require a premium microporous structure to dry quickly and anchor securely. Without a high-quality surface texture, the heavy particles will simply flake off once dry. Pigment offers superior archival stability. It resists fading under intense light and holds incredibly dense blacks.
The terminology here often confuses buyers. You need to understand exactly what manufacturers mean by these labels.
Clarification: "Waterproof" in this context does not mean you can submerge the final print in a bucket of water. It means the coating chemically locks the liquid payload in place. Once cured, the image will not dissolve from atmospheric humidity or damp hands. Non-waterproof alternatives remain sensitive to ambient moisture long after leaving the output tray. For reliable daily operations, you should always standardize on waterproof-rated options.
Your hardware dictates the physical dimensions and weight your media must possess. Pushing incorrect thicknesses through your machinery causes premature wear on feed rollers. You must balance economy with reliability.
Material thickness is measured in mils (thousandths of an inch) or microns. The right thickness ensures the sheet lays flat on your exposure unit without bowing.
4 Mil (approx. 100 microns): This is a highly economical option. It is suitable for basic jobs and simple graphics. However, it carries a higher risk of curling. Older hardware frequently struggles to grip this thin profile, causing feed errors.
5 to 5.3 Mil (125 - 135 microns): This represents the commercial sweet spot. It provides excellent dimensional stability. This stability is critical for holding tight registration on multi-color jobs. It lays perfectly flat on the glass and feeds reliably through high-speed commercial rollers.
You must align your form factor with your production volume and hardware capabilities. Upgrading your form factor often requires hardware adjustments.
Pre-cut Sheets (A4, 8.5x11, 13x19): These are ideal for small studios. They work perfectly for rapid prototyping and low-volume production. They require no special adapters.
Continuous Rolls (17", 24", 36"+): Roll media is strictly necessary for true scalability. You need rolls to produce large-format positives for oversized garments or signage. You must ensure your hardware includes dedicated roll-feed adapters and built-in automatic cutters.
Static electricity is a hidden enemy in print production. Plastic films naturally generate static charges when handled or stacked. You must evaluate whether the manufacturer applies anti-static treatments during production. Untreated sheets cling tightly together in the input tray. This clinging causes multi-sheet misfeeds, ruining several sheets at once and potentially damaging internal printer mechanisms. Always prioritize materials advertised with anti-static backing layers.
Never base your final purchasing decision on a specification sheet alone. You must validate the material in your exact environment. Implement a rigorous testing process to mitigate financial risk. Follow these actionable steps to ensure compatibility.
Step 1: Check Printer Specifications. Dig into your hardware manual first. Verify the maximum media thickness your specific model can handle without jamming. Confirm your exact chemistry (dye vs. pigment) before you start shortlisting materials.
Step 2: Procure Sample Packs. Never buy wholesale quantities blindly. Purchase a small 10-20 sheet sample pack of your shortlisted materials. This small investment prevents massive losses later.
Step 3: Run the "Scratch and Smudge" Test. Create a test file containing a heavy, solid black block. Push the material through your hardware. Wait exactly 15 minutes. Lightly press your thumb against the dense black area. Assess if it smudges or flakes. If it fails here, the coating is incompatible.
Step 4: Execute an Exposure Test (For Screen Printers). Do not assume a dark print guarantees a good screen. Run a step-wedge calculator using the printed positive. Verify that the printed density effectively blocks your specific exposure light source. Look closely for light undercutting or soft edges in the final washed-out stencil.
Choosing the correct media is fundamentally an exercise in matching hardware capabilities to your desired outcome. You must carefully align your chemistry and physical specifications with the material's coating and opacity. Taking shortcuts on these specifications always leads to downstream failures.
Investing in the correct 5-mil thickness and premium microporous coatings upfront pays dividends. This proactive approach prevents compounding costs associated with ruined screens, wasted liquids, and lost production hours. Reliable materials stabilize your entire workflow.
Your immediate next step is clear. Pull up your current hardware manual and check your exact model specifications. Identify your chemistry type and maximum thickness limits right now, before you order another batch of media.
A: You must print on the coated side. This side feels slightly textured or sticky compared to the smooth, glossy back. To identify it quickly, lightly dampen your finger and touch a corner. Your finger will stick slightly to the coated, printable surface. The smooth side will not grab your finger.
A: Absolutely not. Laser hardware uses intense heat to fuse dry toner onto paper. Plastics formulated for liquid chemistry will melt instantly under these extreme temperatures. This melted plastic will wrap around the fuser rollers, permanently destroying your hardware. Always use media explicitly rated for laser temperatures if using toner.
A: This usually points to a chemical mismatch. You might be printing on the wrong side. You might be using incompatible dye formulations on a pigment-only coating. Alternatively, your RIP software might be pushing an excessive liquid limit. Try lowering the density setting in your software to prevent surface flooding.
A: Proper storage prevents coating degradation. Always store unused sheets perfectly flat to prevent edge curling. Keep them sealed in their original protective plastic packaging to ward off ambient humidity. Store the packages in a climate-controlled room, far away from direct sunlight and extreme temperature fluctuations.


